


"If I lose my hands I could type with my mouth. Take my VA and I'm done."
It doesn't write the code for me, but it provides the tools for me to write it faster and better. I'm getting to really like the VA Code Inspection and the Extract Method really helps.
It doesn't write the code for me, but it provides the tools for me to write it faster and better. I'm getting to really like the VA Code Inspection and the Extract Method really helps.

"Great software to code fast!"
I think VA does its core job best! Refactoring of code and which helps me tremendously with my projects. I can code faster and deliver faster. I think I am so addicted to the software that I cannot do without it even one day! And thats true!
I think VA does its core job best! Refactoring of code and which helps me tremendously with my projects. I can code faster and deliver faster. I think I am so addicted to the software that I cannot do without it even one day! And thats true!

"Good performance on large projects, handy for everyday workflow."
The most performant solution among several alternatives I've tried on a large project.
The most performant solution among several alternatives I've tried on a large project.

"Visual Assist is absolutely essential."
Visual Assist is absolutely needed for professional programming in Visual Studio… The time saved through the use of these very basic things is quite incalculable to the point where there's just no reason for anyone to ever use Visual Studio without Visual Assist.
Visual Assist is absolutely needed for professional programming in Visual Studio… The time saved through the use of these very basic things is quite incalculable to the point where there's just no reason for anyone to ever use Visual Studio without Visual Assist.

"Visual Assist is an absolute essential when it comes to working with large code bases."
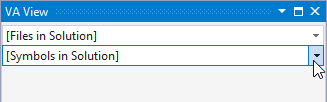
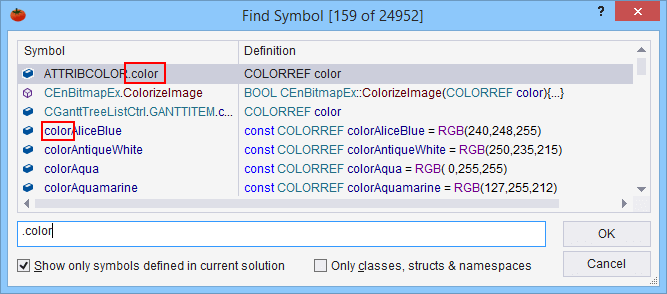
Visual Assist drastically improves upon the built-in Intellisense system provided in Visual Studio. When using Visual Assist, I find that I spend much less time combing through Unreal Engine code as well as my own. The 'Search for Symbol' feature also allows filtering out engine code in order to quickly find symbols within my own code.
Visual Assist drastically improves upon the built-in Intellisense system provided in Visual Studio. When using Visual Assist, I find that I spend much less time combing through Unreal Engine code as well as my own. The 'Search for Symbol' feature also allows filtering out engine code in order to quickly find symbols within my own code.

"A real assistant."
Fewer errors, less googling, and less confusion. It provides what I expect from a modern IntelliSense.
Fewer errors, less googling, and less confusion. It provides what I expect from a modern IntelliSense.
